This basic guide shows how to configure ADFS with uStudio Podcast. Please note that this guide may not cover everything your organization may want to set up.
PREREQUISITE
uStudio needs a sign-on URL and certificate.
Step 1: Adding a Relying Party Trust
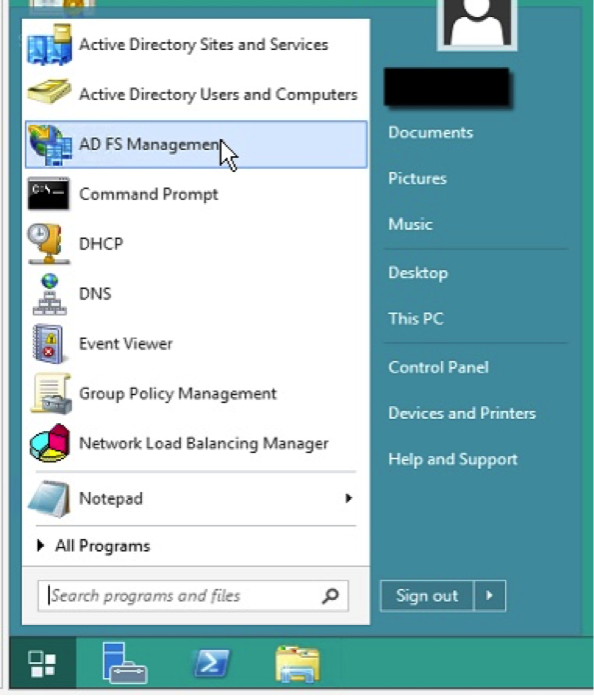
- Go to ADFS Management.
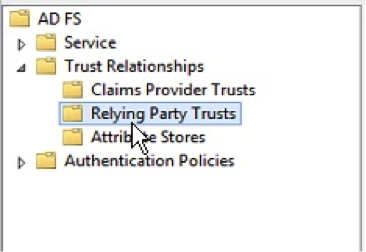
- Select “Relying Party Trusts” within the tree folder of ADFS.
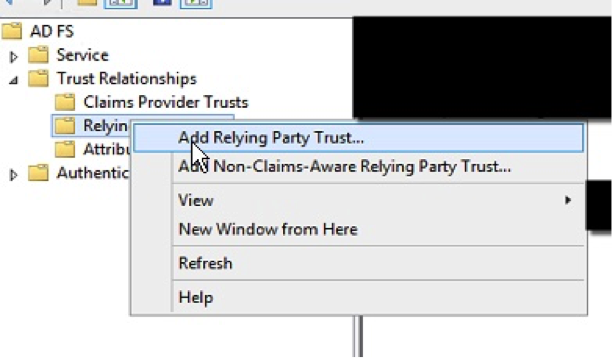
- Then right-click and select “Add Relying Party Trust…”.
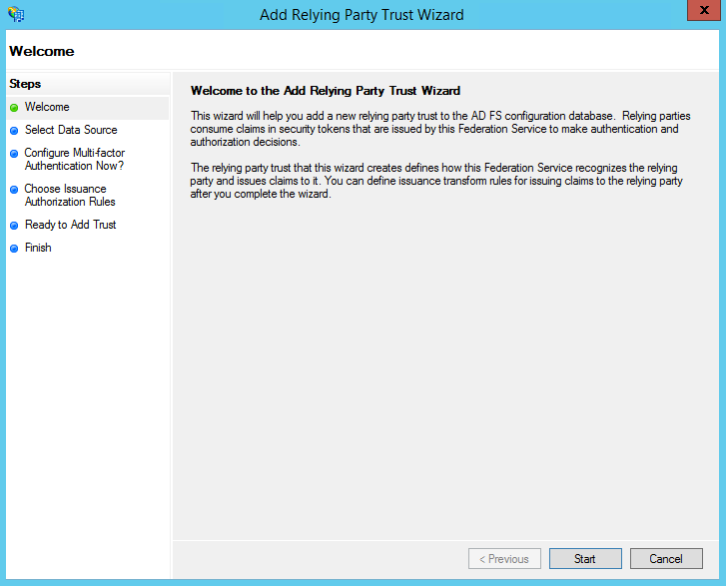
Step 2: Basic ADFS Configuration
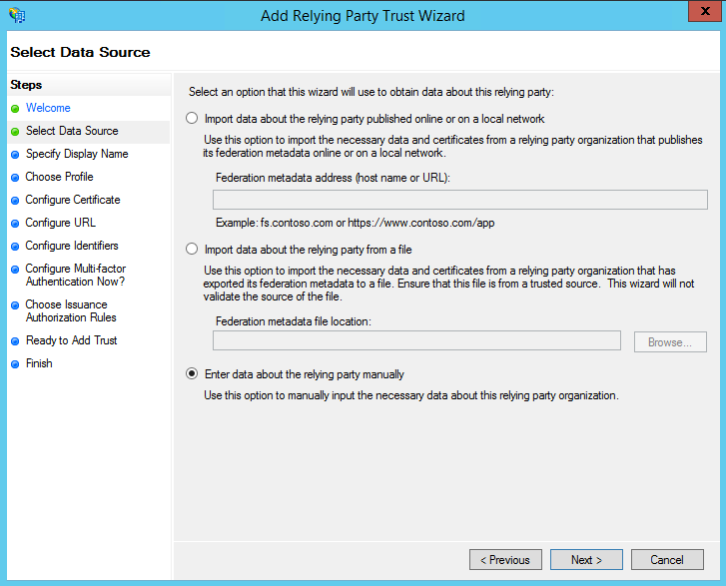
- Click “Start” at the bottom to navigate to “Select Data Source”.
- Import uStudio’s metadata or enter information manually. This guide will assume fields are to be entered manually.
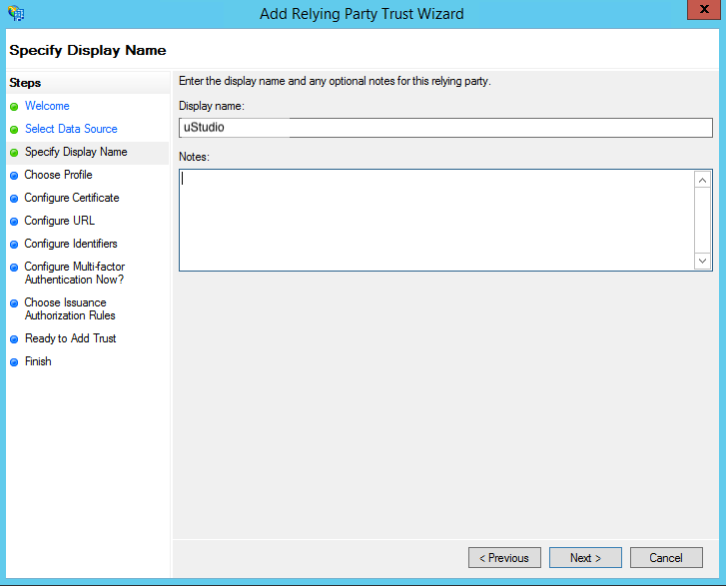
- Click “Next” at the bottom to navigate to “Specify Display Name”.
- Enter a display name (e.g. uStudio).
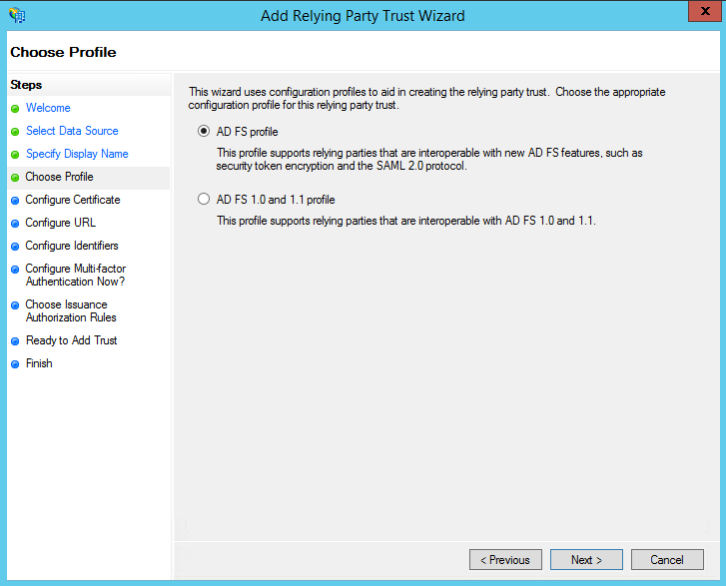
- Click “Next” at the bottom to navigate to “Choose Profile”.
- Ensure “ADFS profile” is selected for SAML2.0 protocol.
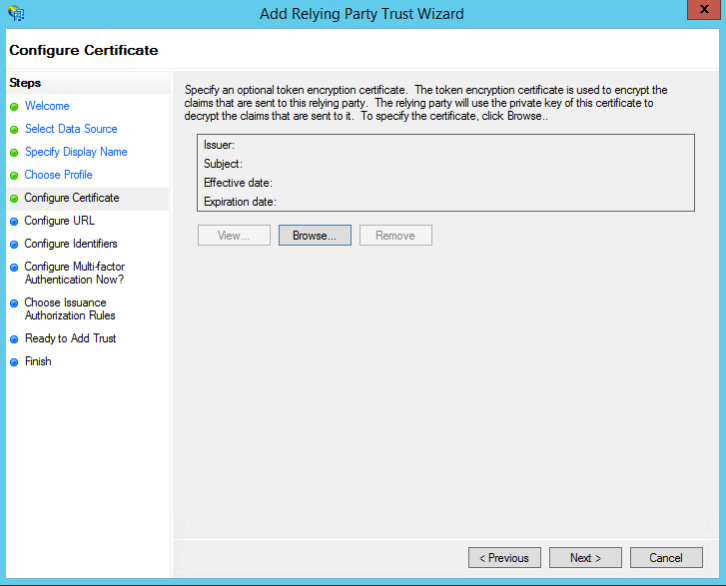
- Click “Next” at the bottom to navigate to “Configure Certificate”.
- Import uStudio’s certificate.
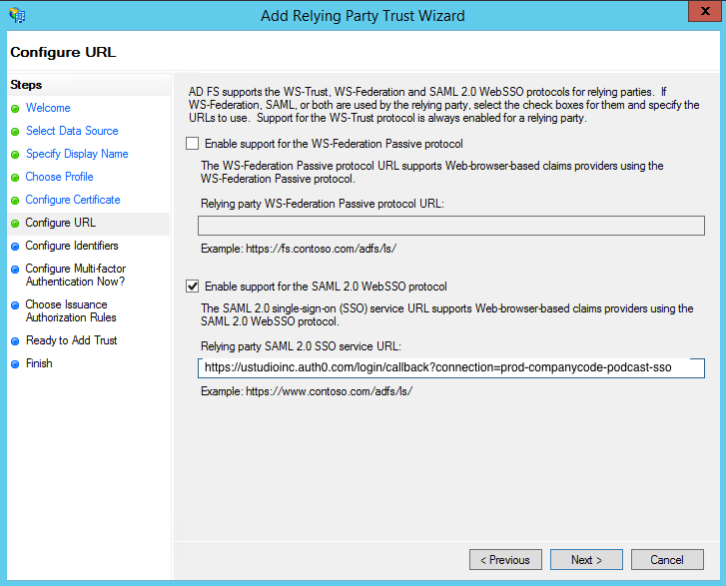
- Click “Next” at the bottom to navigate to “Configure URL”.
- Check “Enable support for the SAML 2.0 WebSSO protocol”.
- Set “Relying party SAML 2.0 SSO service URL” with https://ustudioinc.auth0.com/login/callback?connection=prod-companycode-podcast-sso
- Note: companycode is provided to you by uStudio.
- Click “Next” at the bottom to navigate to “Configure Identifies”.
- Set “Relying party trust identifier” with urn:auth0:ustudioinc:prod-companycode-podcast-sso
- Click “Add”.

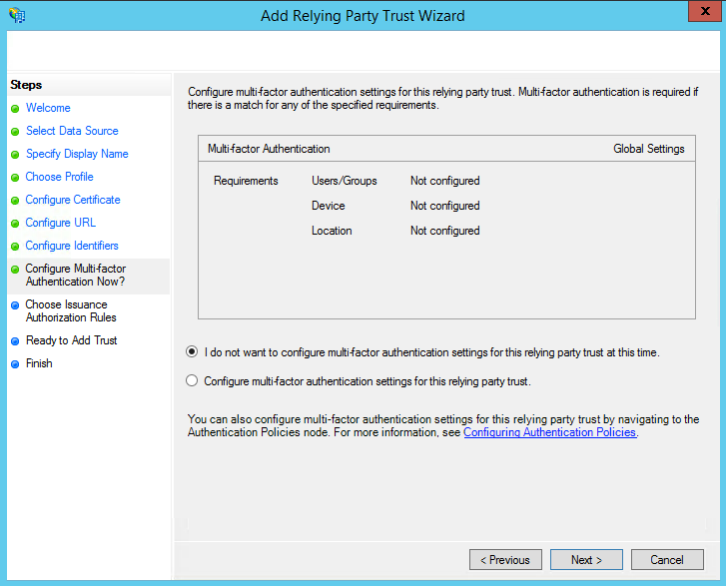
- Click “Next” at the bottom to navigate to “Configure Multi-factor Authentication Now?”.
- Select “I do not want to configure multi-factor…”. Note: MFA enablement is up to you.
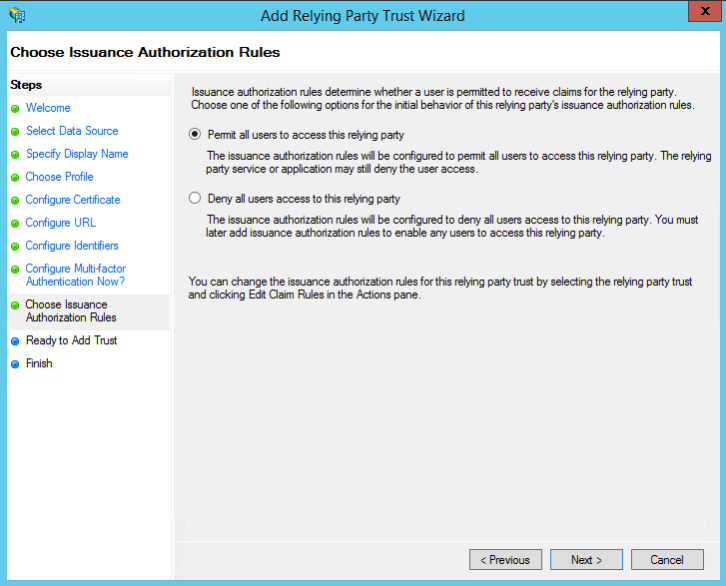
- Click “Next” at the bottom to navigate to “Choose Issuance Authorization Rules”.
- Select “Permit all users…”. Note: You can deny all users if you wish to use a group or further restrictions.
- Click “Next” at the bottom to navigate to “Ready to Add Trust”.
- Review settings.

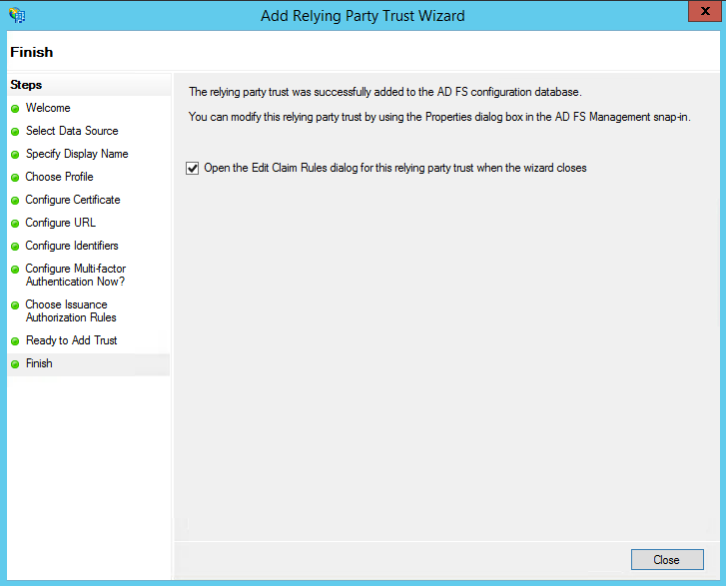
- Click “Next” at the bottom to navigate to “Finish”.
- Ensure the checkbox next to “Open the Edit…”.
- Click “Close”.
Step 3: Creating Claim Rules
Using the table below, you’ll want to repeat these steps to map out attributes.
| Requirement | Rule | LDAP Attribute | Outgoing Attribute |
|---|---|---|---|
| Required | User ID | E-Mail-Addresses or Unique ID | user_id |
| Optional | E-Mail-Addresses | ||
| Optional | First Name | Given-Name | given_name |
| Optional | Last Name | Surname | family_name |
| Optional | Groups | * | groupName |
*Note: According to this Microsoft guide, there is a template called “Send Group Membership as a Claim” within the drop-down of “Claim rule template”. groupName is a multivalued attribute with unique names or ids for groups.
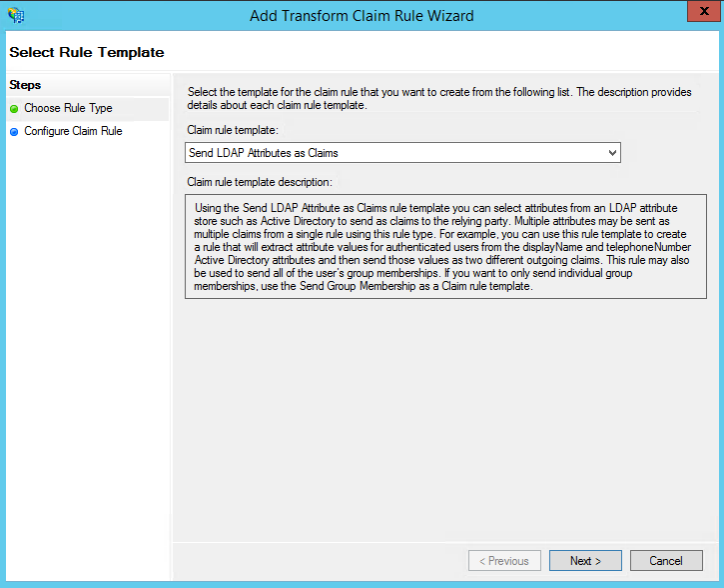
- Under “Issuance Transform Rules”, click “Add Rule…”.
- Select “Send LDAP Attributes as Claims” within the drop-down of “Claim rule template”.
- Click “Next” at the bottom.
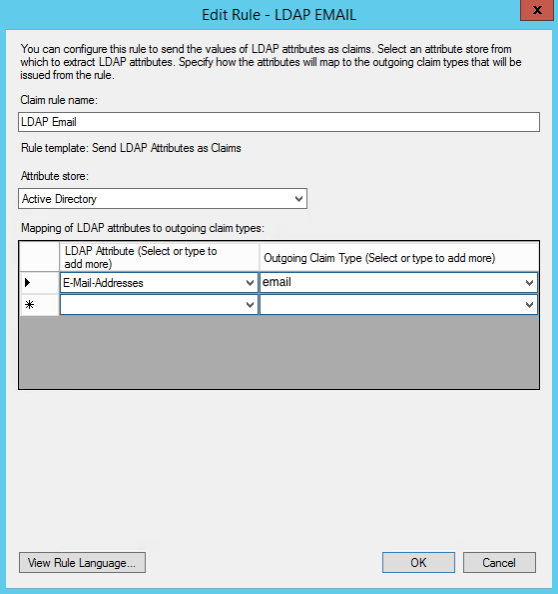
- Set “Claim rule name” to (e.g. “ LDAP Email”).
- Set “Attribute store” to “Active Directory”.
- Set “LDAP Attribute…” to “E-Mail-Addresses”.
- Set “Outgoing Claim…” to “email” by typing in.
- Click “OK” to save the rule and continue.
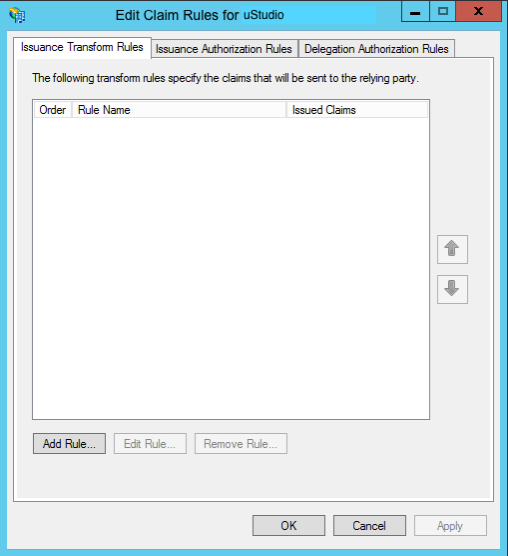
- Once you’re done mapping attributes, click “OK” in the pane of “Edit Claim Rules for…” (first image).
Step 4: Advanced Settings
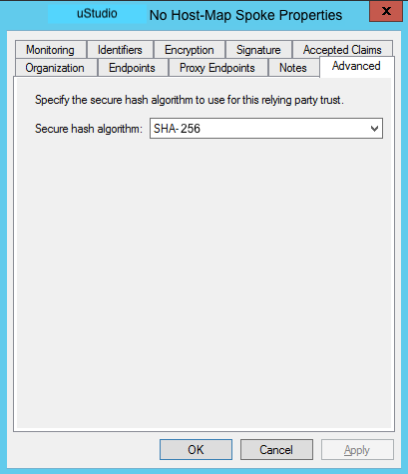
To access these settings, select “Properties” from the “Actions” sidebar on the right while you have “Relying Party Trust” selected.
- Select “Advanced” tab.
- Set “Secure hash algorithm” to “SHA-256”.
- Select “Endpoints” tab.
- Click “add SAML” to add this endpoint.
- Set “Endpoint type” to “SAML Logout”.
- Set “Binding” to “POST”
- Set “Trusted URL” to your ADFS.
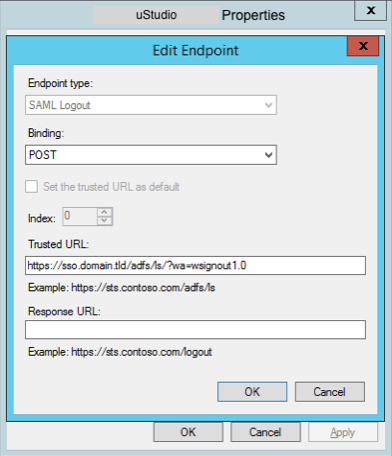
- Note: You may need to configure something similar for login as a redirect.
Step 5: Test SSO connection…
Test with support@ustudio.com
Credits
This guide is based off of LiquidPlanner’s ADFS SSO configuration guide.


