This basic guide shows how to configure OneLogin with uStudio Podcast. Please note that this guide may not cover everything your organization may want to set up.
PREREQUISITE
uStudio needs a sign-on URL and certificate. See Step 4, part 3 for details.
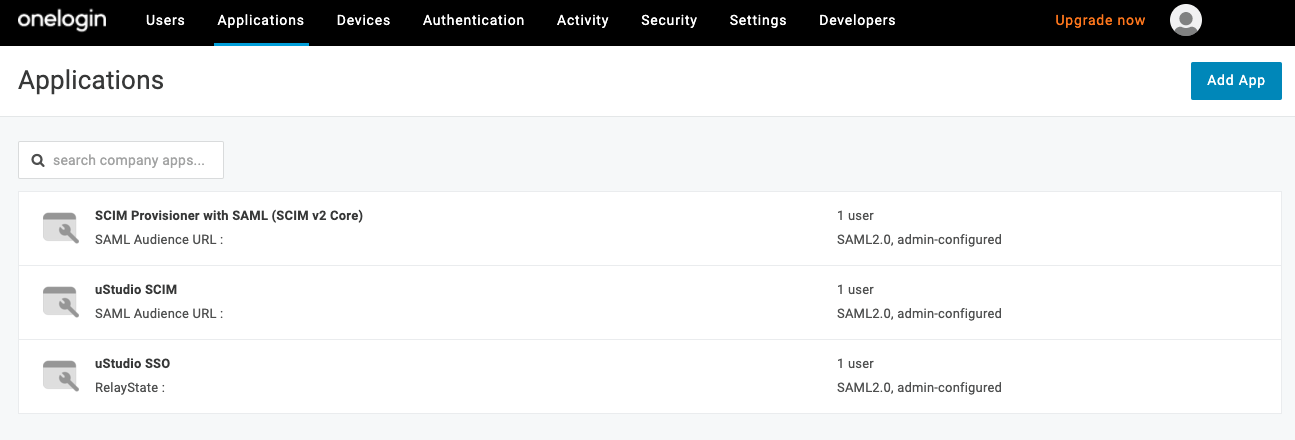
Step 1: Creating an OneLogin SSO Application
- Login into OneLogin as an administrator.
- Select the Applications tab.
- Click Add App in the top-right corner.
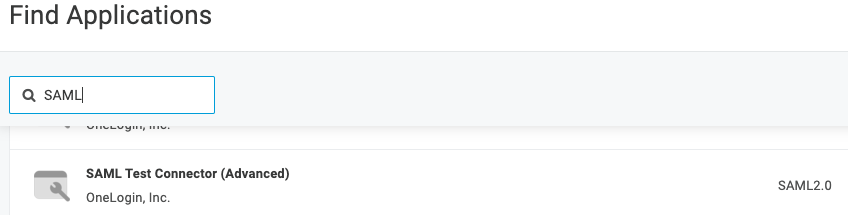
- Search for “SAML Test Connector (Advanced).”
- Click “SAML Test Connector (Advanced)” to add it.
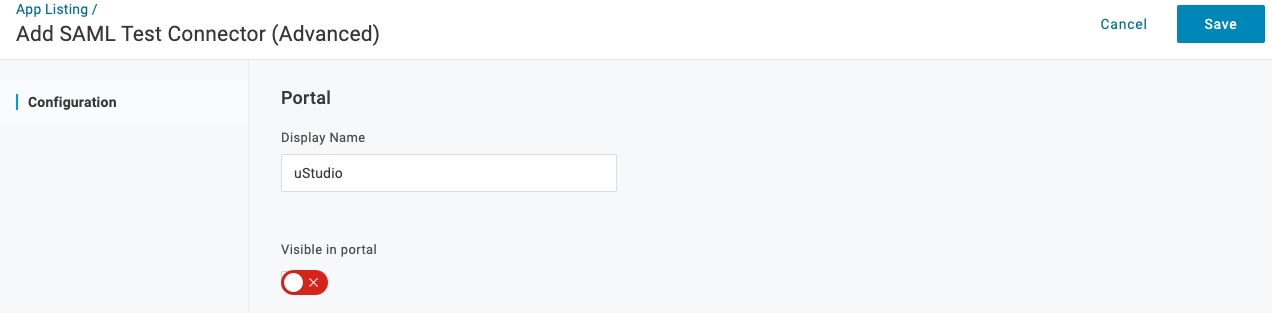
- Set Display Name to (e.g. uStudio SSO).
- Disable Visible in portal because we’re service provider initiated.
- Click Save to continue.
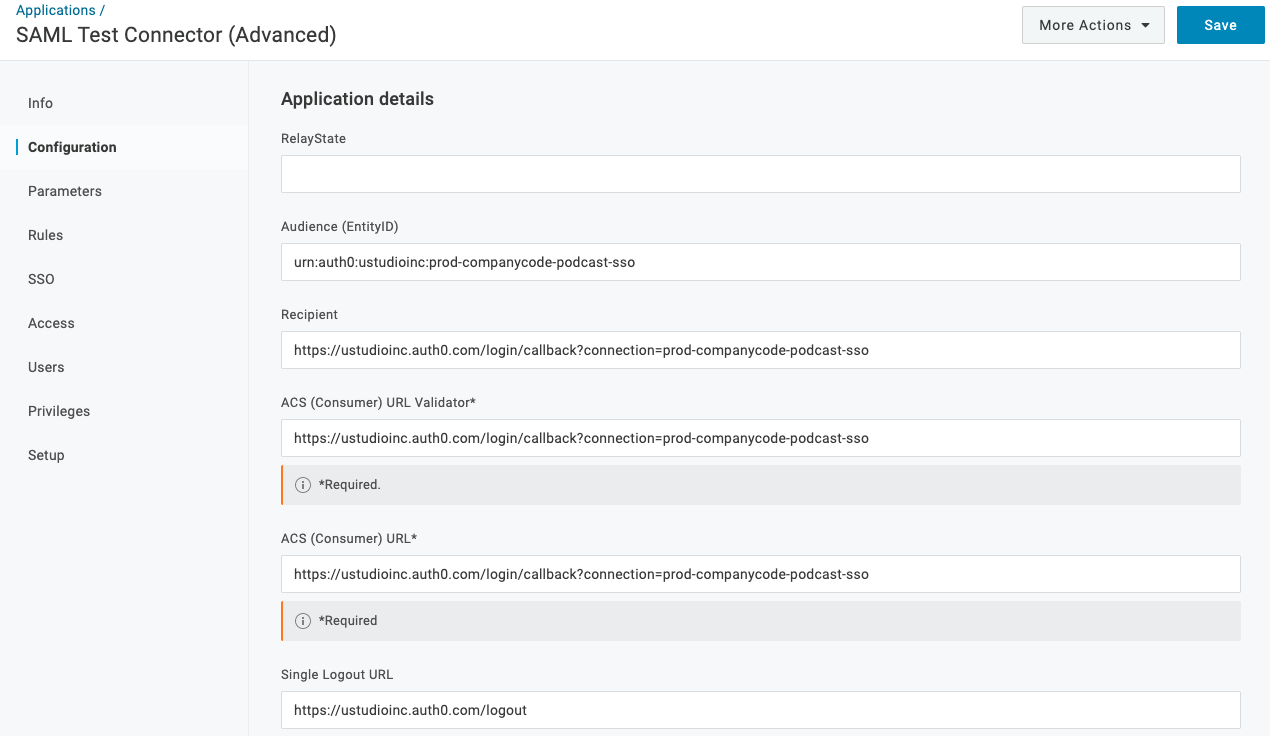
Step 2: Configuration
- Select the Configuration tab.
- Leave RelayState blank.
- Set Audience (EntityID) to urn:auth0:ustudioinc:prod-companycode-podcast-sso.
- Set Recipient, ACS (Consumer) URL Validator, and ACS (Consumer) URL to https://ustudioinc.auth0.com/login/callback?connection=prod-companycode-podcast-sso.
Note: companycode is provided by uStudio. - Set Single Logout URL to https://ustudioinc.auth0.com/logout.
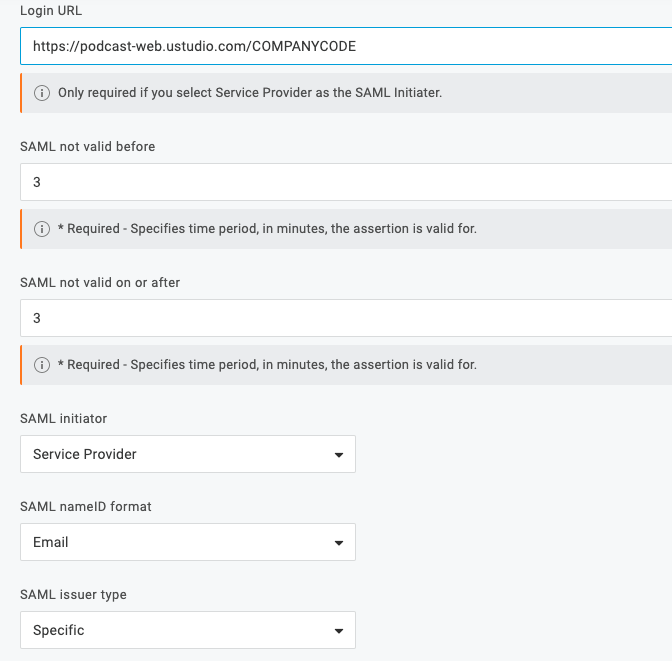
- Set Login URL to https://podcast-web.ustudio.com/COMPANYCODE.
Note: COMPANYCODE is provided by uStudio. - Set SAML not valid before to 3.
- Set SAML not valid on or after to 3.
- Set SAML initiator to Service Provider.
- Set SAML nameID format to Email.
- Set SAML issuer type to Specific.
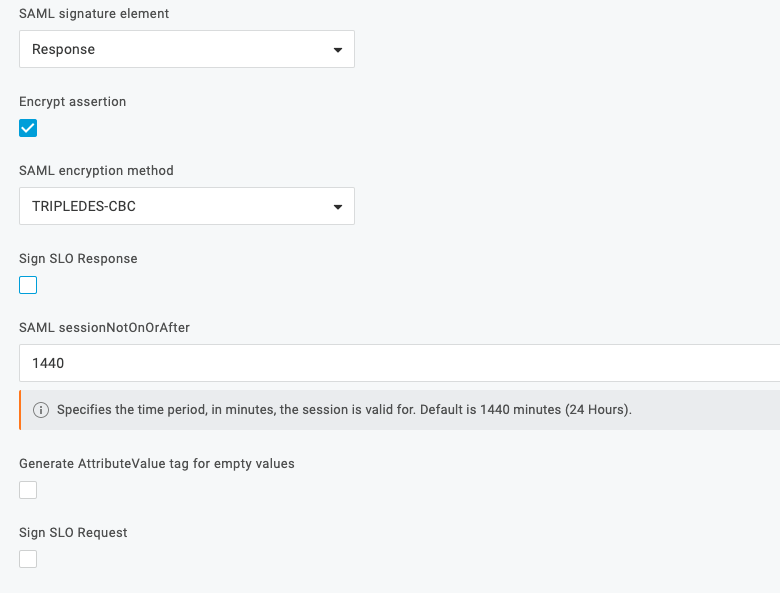
- Set SAML signature element to Response.
- Check Encrypt assertion.
- Set SAML encryption method to TRIPLEDES-CBC.
- Uncheck Sign SLO Response.
- Set SAML sessionNotOnOrAfter to 1440.
- Uncheck Generate AttributeValue tag for empty values.
- Uncheck Sign SLO Request.
- Click Save to continue.
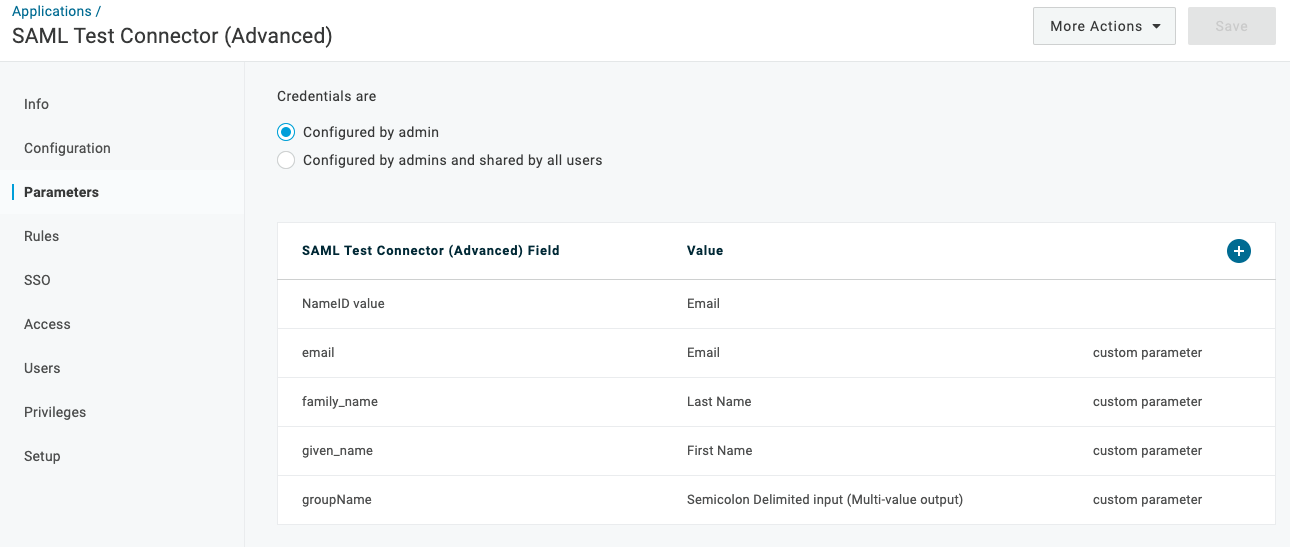
Step 3: Parameters
- Select the Parameters tab.
- Select Configured by admin under Credentials are.
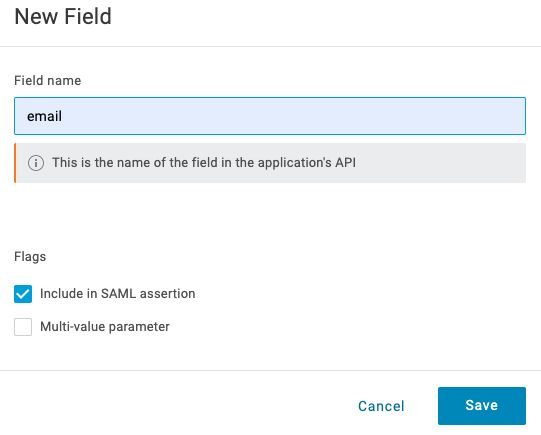
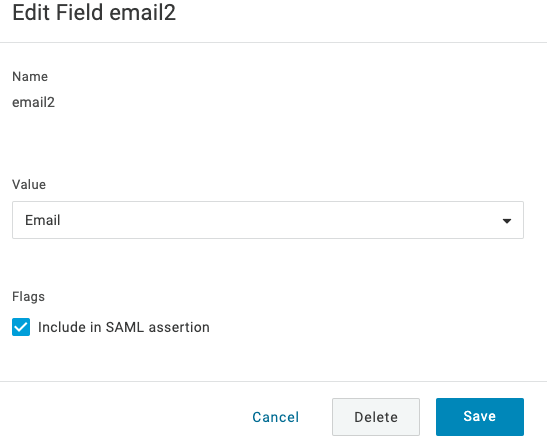
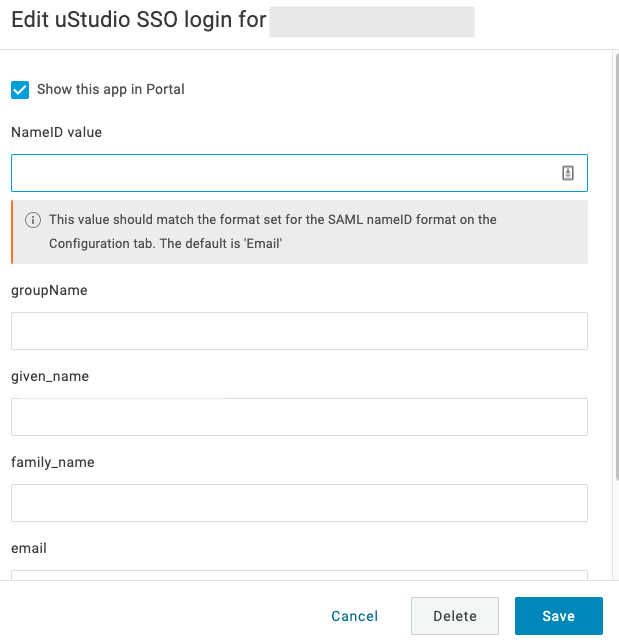
- [Optional] Click the + button to add a parameter with Field set to email and Value set to Email. When editing the parameter, check Include in SAML assertion (see below for details).
- [Optional] Click the + button to add a parameter with Field set to family_name and Value set to Last Name. When editing the parameter, check Include in SAML assertion (see below for details).
- [Optional] Click the + button to add a parameter with Field set to given_name and Value set to First Name. When editing the parameter, check Include in SAML assertion (see below for details).
- [Optional] Click the + button to add a parameter with Field set to groupName and Value set to User Roles with Semicolon Delimited input (Multi-value output) selected. When editing the parameter, check Include in SAML assertion and check Multi-value parameter (see below for details).
Note: To establish 1 to 1 parity with our system, we use User Roles to define groups because we support users assigned to multiple groups and OneLogin only supports that a user is assigned to one Group at a time. - Click Save to continue.
Step 4: SSO
- Select the SSO tab.
- Set SAML Signature Algorithm to SHA-256.
- Send the Issuer URL to your uStudio support agent or support@ustudio.com. This link is the metadata file containing your sign-on url and certificate.
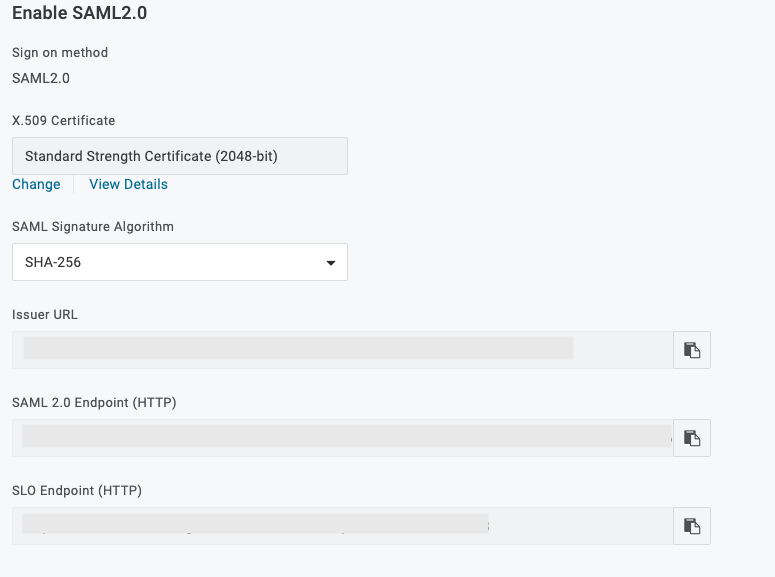
- Click Save to continue.
Step 5: Go back to Configuration
- Select the Configuration tab.
- Scroll to the bottom.
- Insert uStudio’s certificate.
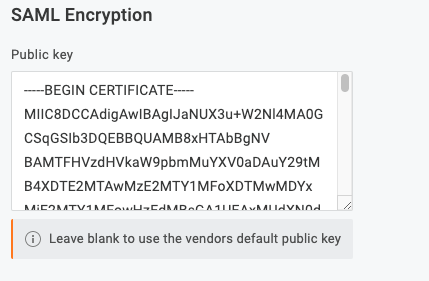
- Click Save.
Step 6: Assigning Users, Groups, and Roles
In this guide, we are going to consider Roles as Groups because of OneLogin’s caveats. OneLogin by default has a Roles attribute, but not a Groups attribute. OneLogin also only allows one group to be assigned to a user.
To assign a user:
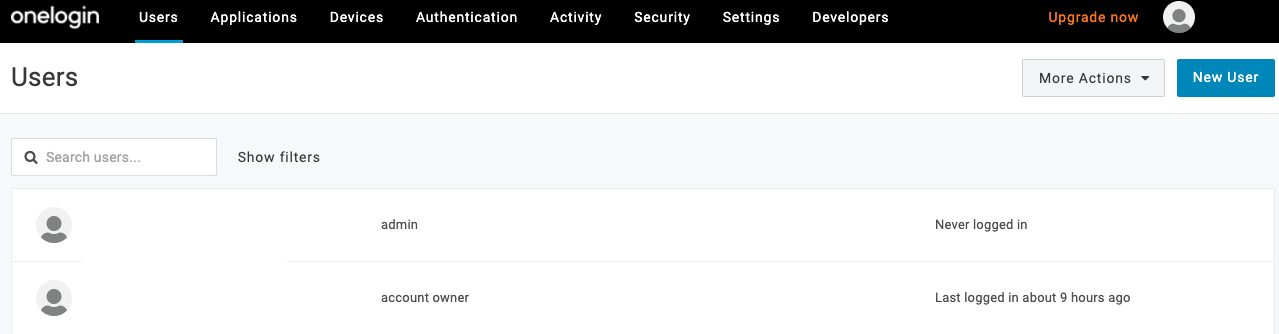
- Select Users under the Users drop-down.
- Click on a user.
- Select Applications.
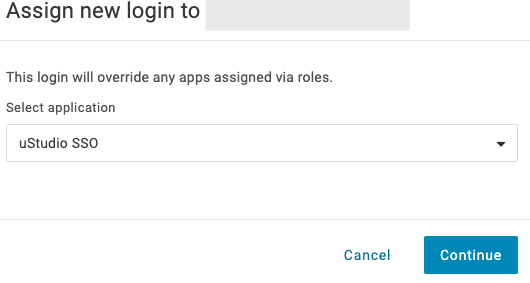
- Click the + button to add an application to this user.
- Select the application name from the drop-down.
- Click Continue.
- Click Save.
To assign a role:
- Select Roles under the Users drop-down.
- Click New Role.
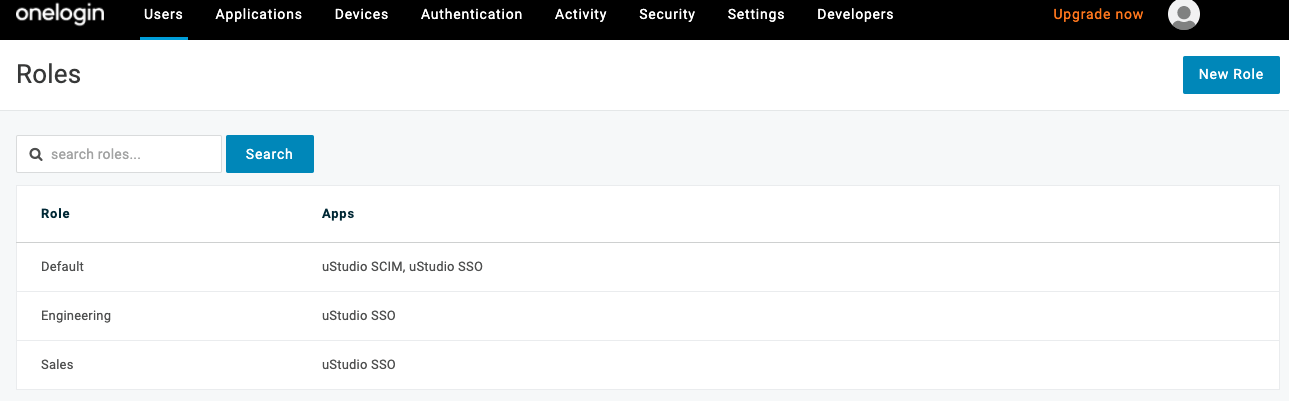
- Name the role (e.g. Admins).
- Select the uStudio SSO (name may vary) application.
- Click Save.

- Select the newly created role.
- Select Users from the left bar.
- Type in a user’s name and click Check.
- Click Add to Role.
- Click Save.

By this point, your user will be assigned to uStudio and with a corresponding Group as a Role.
Step 7: Test with uStudio
Login into uStudio Enterprise Podcast on mobile and web. Tell your uStudio Support Agent or support@ustudio.com to verify the SSO connection.


